Digital Garden is a collection of notes, resources, ideas, quotes, or summaries shared publicly. Unlike a blog post or a published essay, there is no publication date in a digital garden. Everything published in a Digital Garden is evergreen and grows over time. Nothing is considered finished work, and the garden evolves. Digital Gardens are usually lightweight and focus on text and content over the fancy styling features of modern websites.
Read more about the History and Ethos of Digital Gardens .

Features
- Publication dates are not important to Digital Gardeners. Posts are connected via references or common themes.
- There are no featured posts or chronological lists of items. Readers can enter through any note, follow any trail, and exit as they wish.
- Digital Gardens are constantly evolving and are never complete. There is no pressure to publish a perfect post in digital gardens as notes grow over time, just like plants in a garden.
- Every Garden is unique, as the patterns and relationships between notes vary from person to person.
- Gardens are a way of learning in public, opening more possibilities for collaboration.
How I Built My Digital Garden Using Hugo
Since today’s internet is full of blogs and websites filled with scripts and trackers, I decided to keep my Digital Garden simple. I was already frustrated with the performance of WordPress on this blog and wanted something lightweight. I explored various static website frameworks and finally decided to build one using Hugo . Hugo was the obvious choice since I already use Obsidian for research, which uses Markdown , and I was excited to learn a new framework from scratch.
This is not an extensive tutorial providing step-by-step instructions on setting up a website using Hugo. If you’re familiar with some web development or are curious enough, Hugo is pretty easy to learn. If you’re looking to build something quickly with minimal code, check out some no-code options compiled by Ness Labs .
Setting Up Hugo
Install Hugo on your computer. Read more .
Create a folder where you want to build your websites.
Open Terminal or Command Prompt and navigate to that folder (For example:
C:\Users\rishi\Desktop\digital-garden).
Learn more about terminal navigation .
hugo new site example
This command will create a new site called “example”. Read more .
Now you need to add a theme. For my digital garden , I use a theme called Hugo Bear Blog . You can download other themes from the Hugo theme library . Download the theme package from the corresponding website, in this case, from GitHub.
Unzip the file and copy the folder inside the
themes/directory of your website folder.Navigate to
themes/hugo-bearblog/exampleSite/and copy theconfig.tomlfile. Paste theconfig.tomlfile into the main directory.Open the
config.tomlfile using a text editor and make necessary changes. Make sure that the theme name inconfig.tomlmatches the theme folder name inside thethemes/directory.Now run:
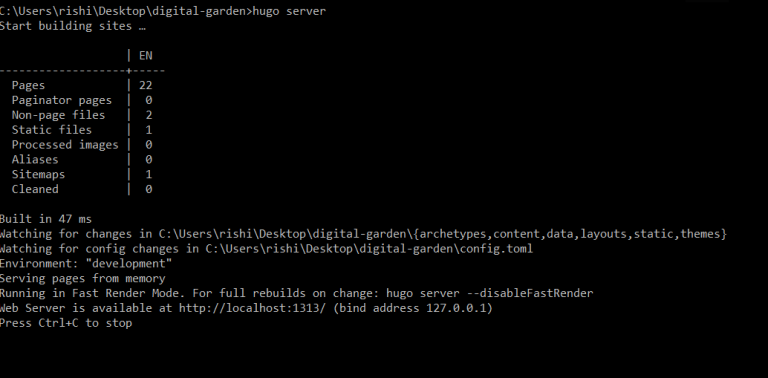
hugo serverThe site will be compiled, and you will get a localhost address to access the site live from the browser.
- Using an editor like Atom , make the necessary changes to customize the theme. To fit my digital garden, I removed the code that displayed dates and sorted lists. If you want to replicate my website, you can access the theme here .

For creating a new post, run the command
hugo new filename. For instancehugo new cyclingwill create a new post called “cycling”.Once you have made the necessary changes locally, press
Ctrl + Cto stop the server. Then type:hugo. This will compile the website and create the static HTML for your website inside thepublic/directory.

- Using an FTP client like
Filezilla
, upload the contents of the
public/directory to the corresponding domain on your server. I have set it to automatically synchronize, so every time I make a change, Filezilla automatically updates my website in the cloud.

If you don’t have your own hosting, you can use GitHub Pages or Netlify . Building this Digital Garden was a lot of fun, and I would definitely recommend creating one from scratch so you can customize it to your liking.
If you’re trying to build a Digital Garden and need assistance, contact me , and I’d be happy to help you set one up.
📚 Want to stay connected?
If you enjoyed this post, you might like my weekly newsletter 10+1 Things read by 2500+ curious minds from 94 countries. Each week, I share personal insights and 11 fascinating finds — books, articles, or random curiosities that spark ideas.
No pressure, but I'd love to have you along for the ride!
Great Article! How did you enable SSL on your link?
Hey Tom! Thanks for checking the article! I actually use a free service called ZeroSSL to setup SSL across all my sites. Just follow their instructions and you're good to go. All you have to do is to upload a small file in the mentioned directory and you will have your certificate ready!
Very good info. Lucky me I recently found your site by accident (stumbleupon). I have saved as a favorite for later!
Thanks a lot for the support!
Thanks for your marvelous posting! I truly enjoyed reading it, you will be a great author.I will make certain to bookmark your blog and definitely will come back at some point. I want to encourage yourself to continue your great writing, have a nice weekend!
Thanks a lot, Angel!